# IGeekFan.AspNetCore.Knife4jUI
一个swagger ui 库:**[knife4j UI](https://gitee.com/xiaoym/knife4j)**,支持 .NET Core3.0+或.NET Standard2.0。
[](https://www.nuget.org/packages/IGeekFan.AspNetCore.Knife4jUI) [](https://www.nuget.org/stats/packages/IGeekFan.AspNetCore.Knife4jUI?groupby=Version) [](https://raw.githubusercontent.com/luoyunchong/IGeekFan.AspNetCore.Knife4jUI/master/LICENSE.txt)
## 相关依赖项
### [knife4j](https://gitee.com/xiaoym/knife4j/tree/master/knife4j-vue)
- knife4j-vue
### [Swashbuckle.AspNetCore](https://github.com/domaindrivendev/Swashbuckle.AspNetCore)
- Swashbuckle.AspNetCore.Swagger
- Swashbuckle.AspNetCore.SwaggerGen
## Demo
- [Basic](https://github.com/luoyunchong/IGeekFan.AspNetCore.Knife4jUI/blob/master/test/Basic)
- [Knife4jUIDemo](https://github.com/luoyunchong/IGeekFan.AspNetCore.Knife4jUI/blob/master/test/Knife4jUIDemo)
## 📚 快速开始
### 🚀安装包
以下为使用Swashbuckle.AspNetCore.Swagger底层组件
1.Install the standard Nuget package into your ASP.NET Core application.
```
Package Manager :
Install-Package Swashbuckle.AspNetCore.Swagger
Install-Package Swashbuckle.AspNetCore.SwaggerGen
Install-Package IGeekFan.AspNetCore.Knife4jUI
OR
CLI :
dotnet add package Swashbuckle.AspNetCore.Swagger
dotnet add package Swashbuckle.AspNetCore.SwaggerGen
dotnet add package IGeekFan.AspNetCore.Knife4jUI
```
2.In the ConfigureServices method of Startup.cs, register the Swagger generator, defining one or more Swagger documents.
```
using Microsoft.AspNetCore.Mvc.Controllers
using Microsoft.OpenApi.Models;
using Swashbuckle.AspNetCore.SwaggerGen;
using IGeekFan.AspNetCore.Knife4jUI;
```
### 🚁 ConfigureServices
3.服务配置,CustomOperationIds和AddServer是必须的。
```
services.AddSwaggerGen(c =>
{
c.SwaggerDoc("v1",new OpenApiInfo{Title = "API V1",Version = "v1"});
c.AddServer(new OpenApiServer()
{
Url = "",
Description = "vvv"
});
c.CustomOperationIds(apiDesc =>
{
var controllerAction = apiDesc.ActionDescriptor as ControllerActionDescriptor;
return controllerAction.ControllerName+"-"+controllerAction.ActionName;
});
});
```
### 💪 Configure
4. 中间件配置
```
app.UseSwagger();
app.UseKnife4UI(c =>
{
c.RoutePrefix = ""; // serve the UI at root
c.SwaggerEndpoint("/v1/api-docs", "V1 Docs");
});
app.UseEndpoints(endpoints =>
{
endpoints.MapControllers();
endpoints.MapSwagger("{documentName}/api-docs");
});
```
5.更多功能
为文档添加注释 在项目上右键--属性--生成

在AddSwaggerGen方法中添加如下代码
```
c.IncludeXmlComments(Path.Combine(AppContext.BaseDirectory, "SwaggerDemo.xml"),true);
```
最后一个参数设置为true,代表启用控制器上的注释
运行后如看不到控制器上注释显示,请点开文档管理->个性化设置,开启分组tag显示description说明属性

### NSwag.AspNetCore
(请参考目录test/WebSites/NSwag.Swagger.Knife4jUI)
```
public void ConfigureServices(IServiceCollection services)
{
// 其它Service
services.AddOpenApiDocument();
}
```
```
public void Configure(IApplicationBuilder app, IWebHostEnvironment env)
{
// 其它 Use
app.UseOpenApi();
app.UseKnife4UI(c =>
{
c.RoutePrefix = "";
c.SwaggerEndpoint("/swagger/v1/swagger.json");
});
}
```
即可使用 Knife4jUI
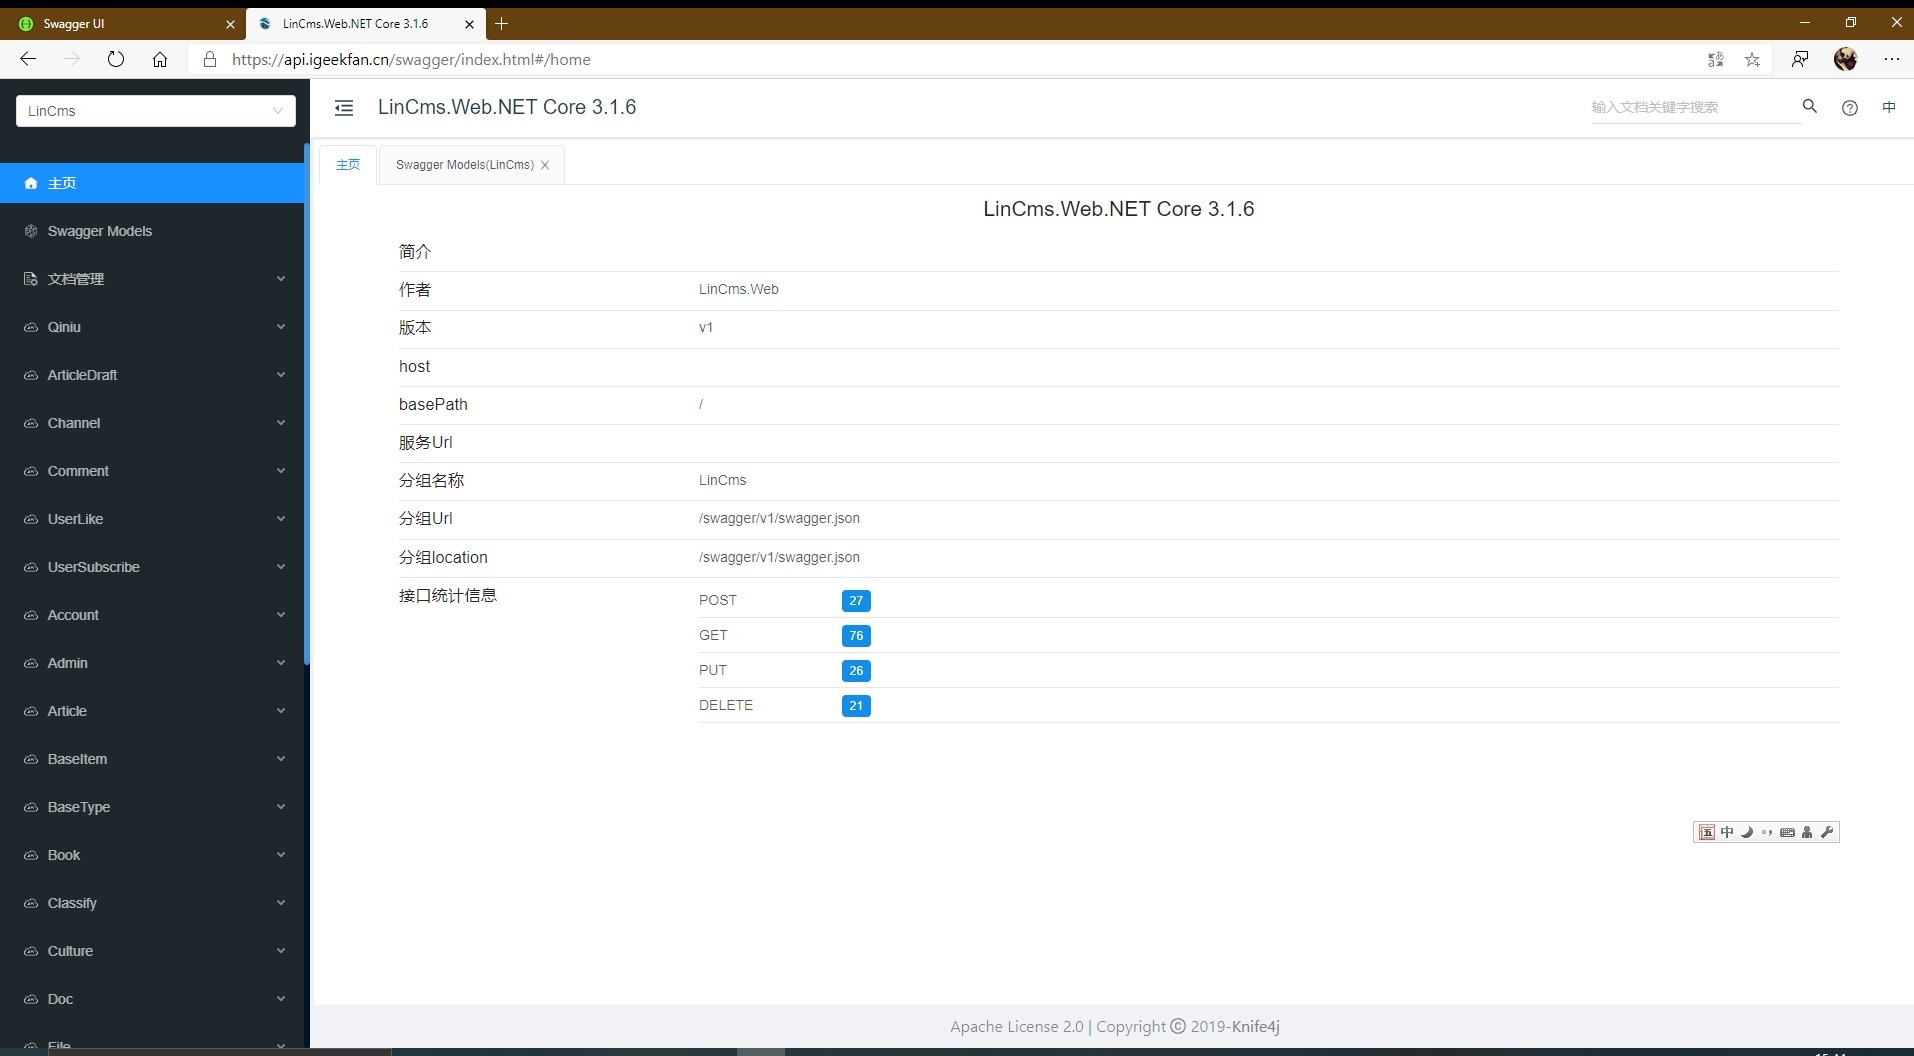
### 🔎 效果图
运行项目,打开 https://localhost:5001/index.html#/home

### 更多配置请参考
- [https://github.com/domaindrivendev/Swashbuckle.AspNetCore](https://github.com/domaindrivendev/Swashbuckle.AspNetCore)
### 更多项目
- [https://api.igeekfan.cn/swagger/index.html](https://api.igeekfan.cn/swagger/index.html)
- [https://github.com/luoyunchong/lin-cms-dotnetcore](https://github.com/luoyunchong/lin-cms-dotnetcore)